Vanilla Coconut Cake


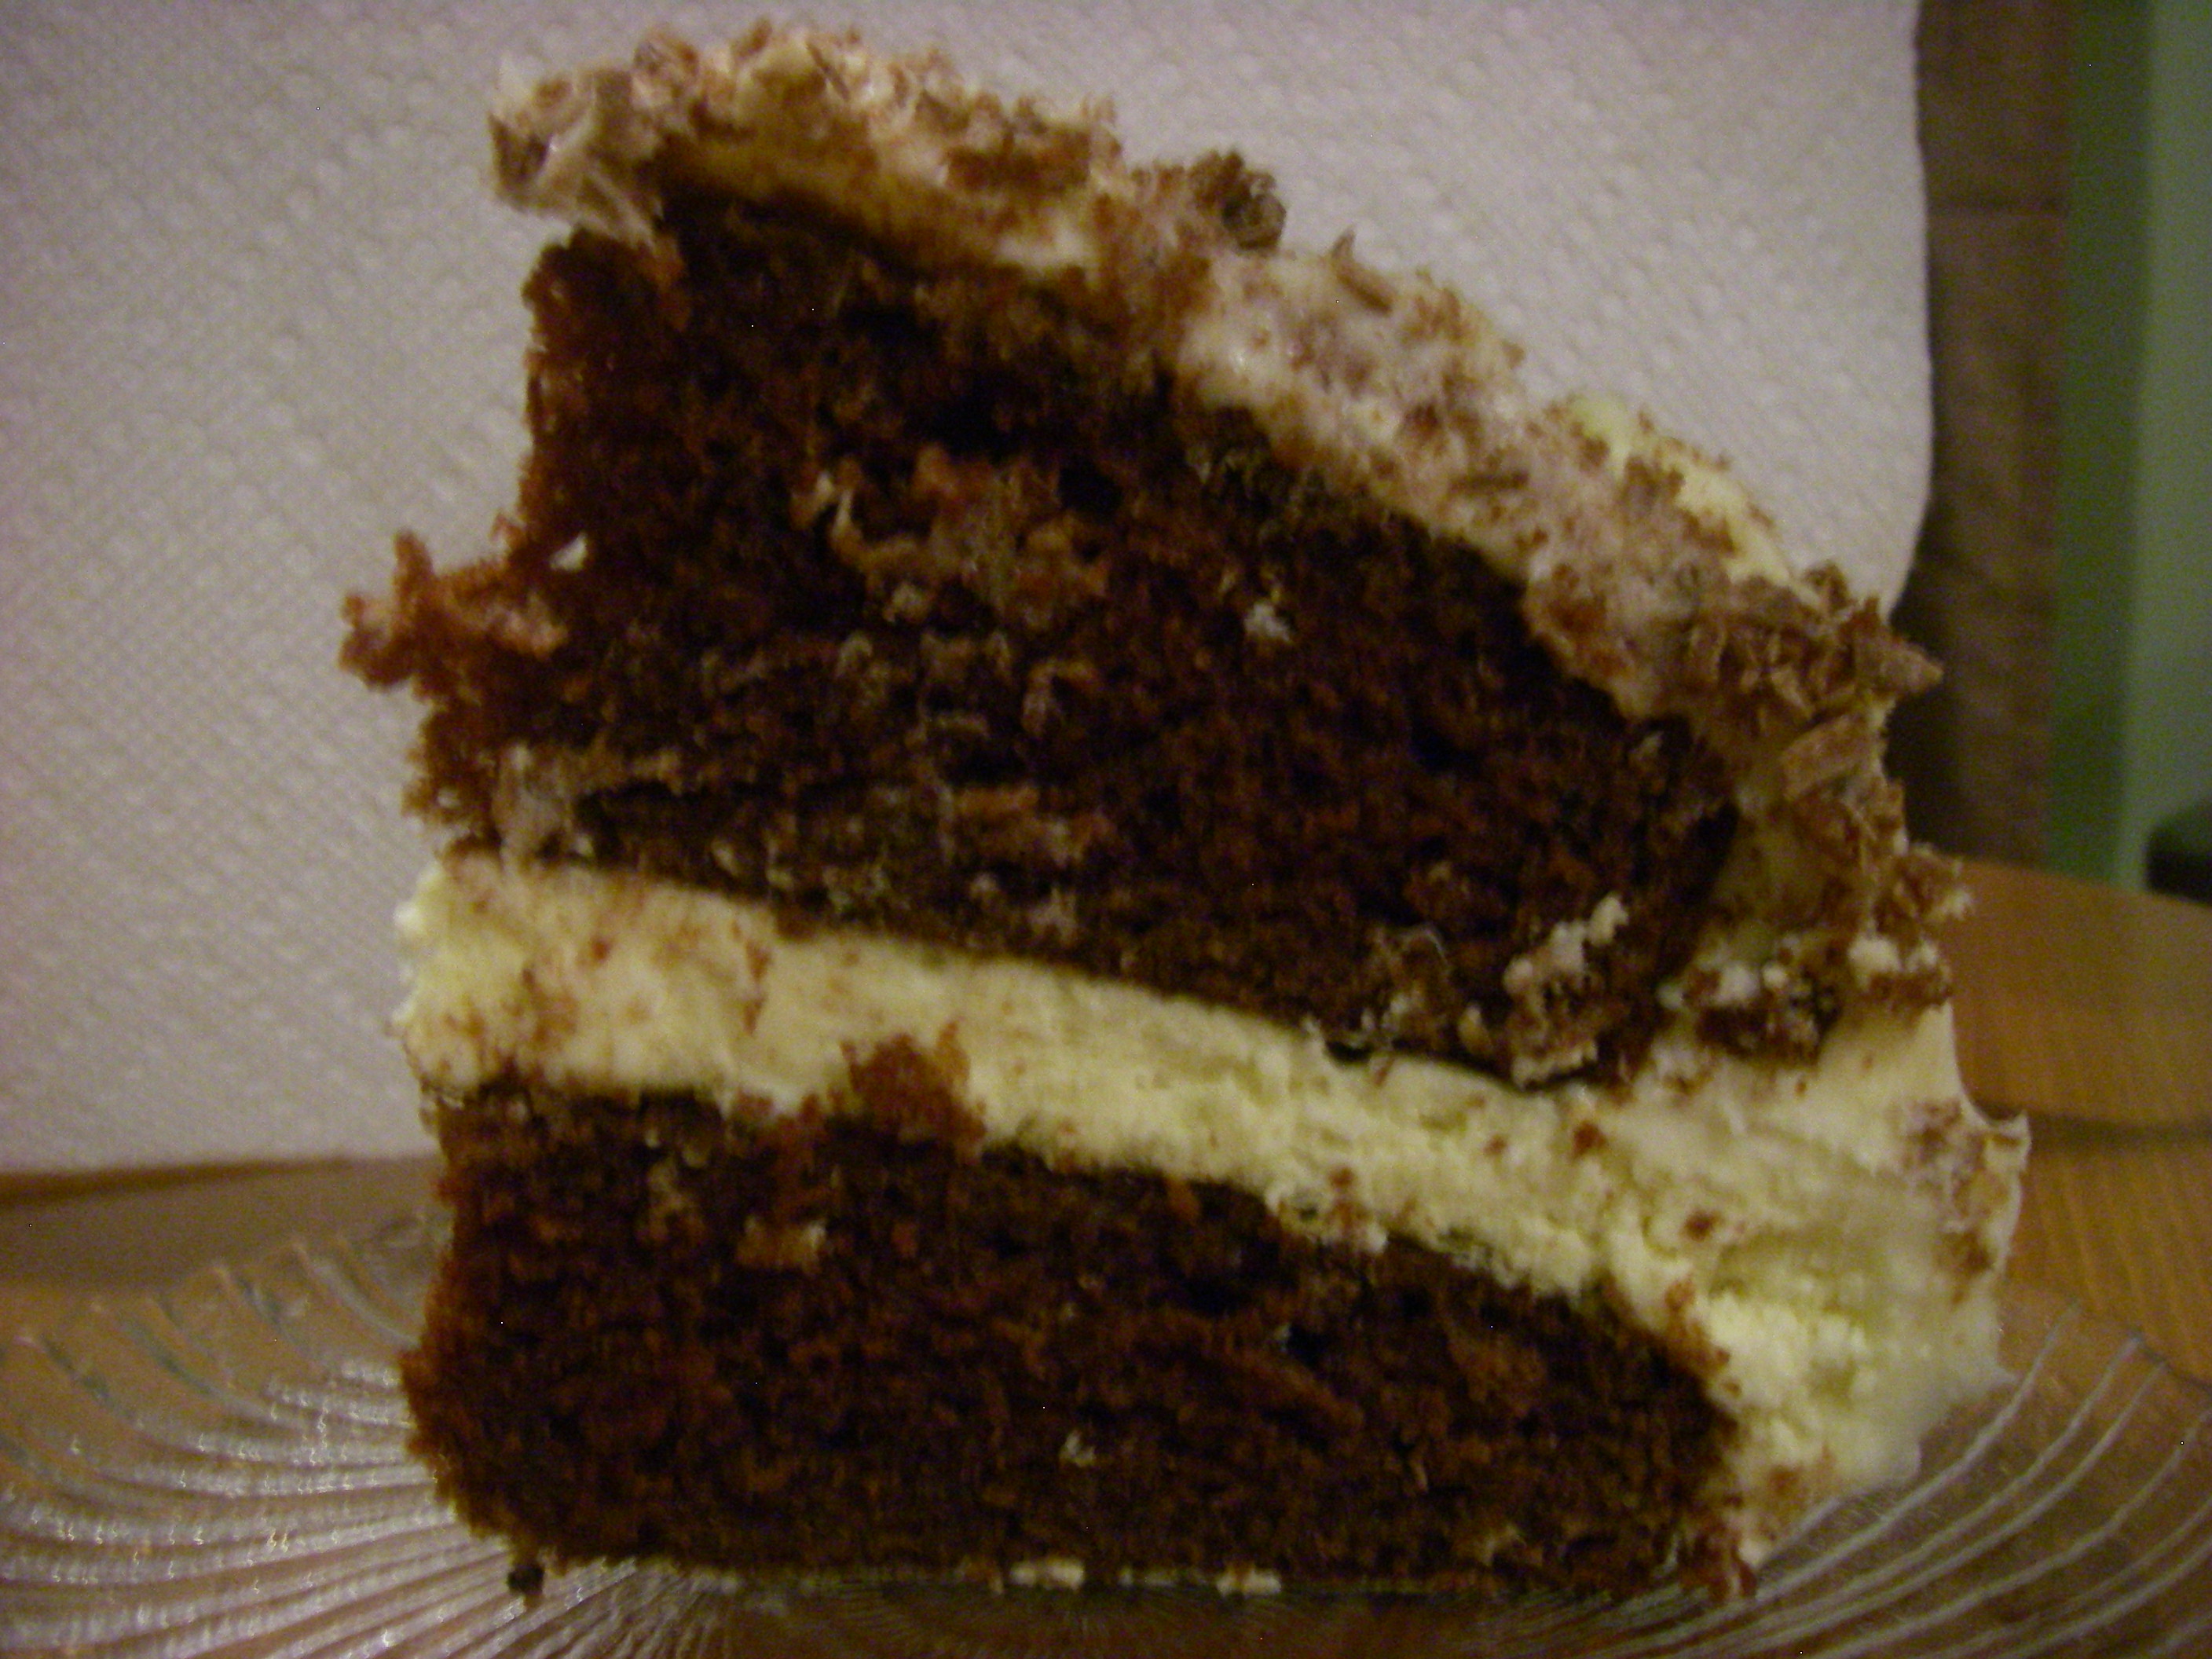
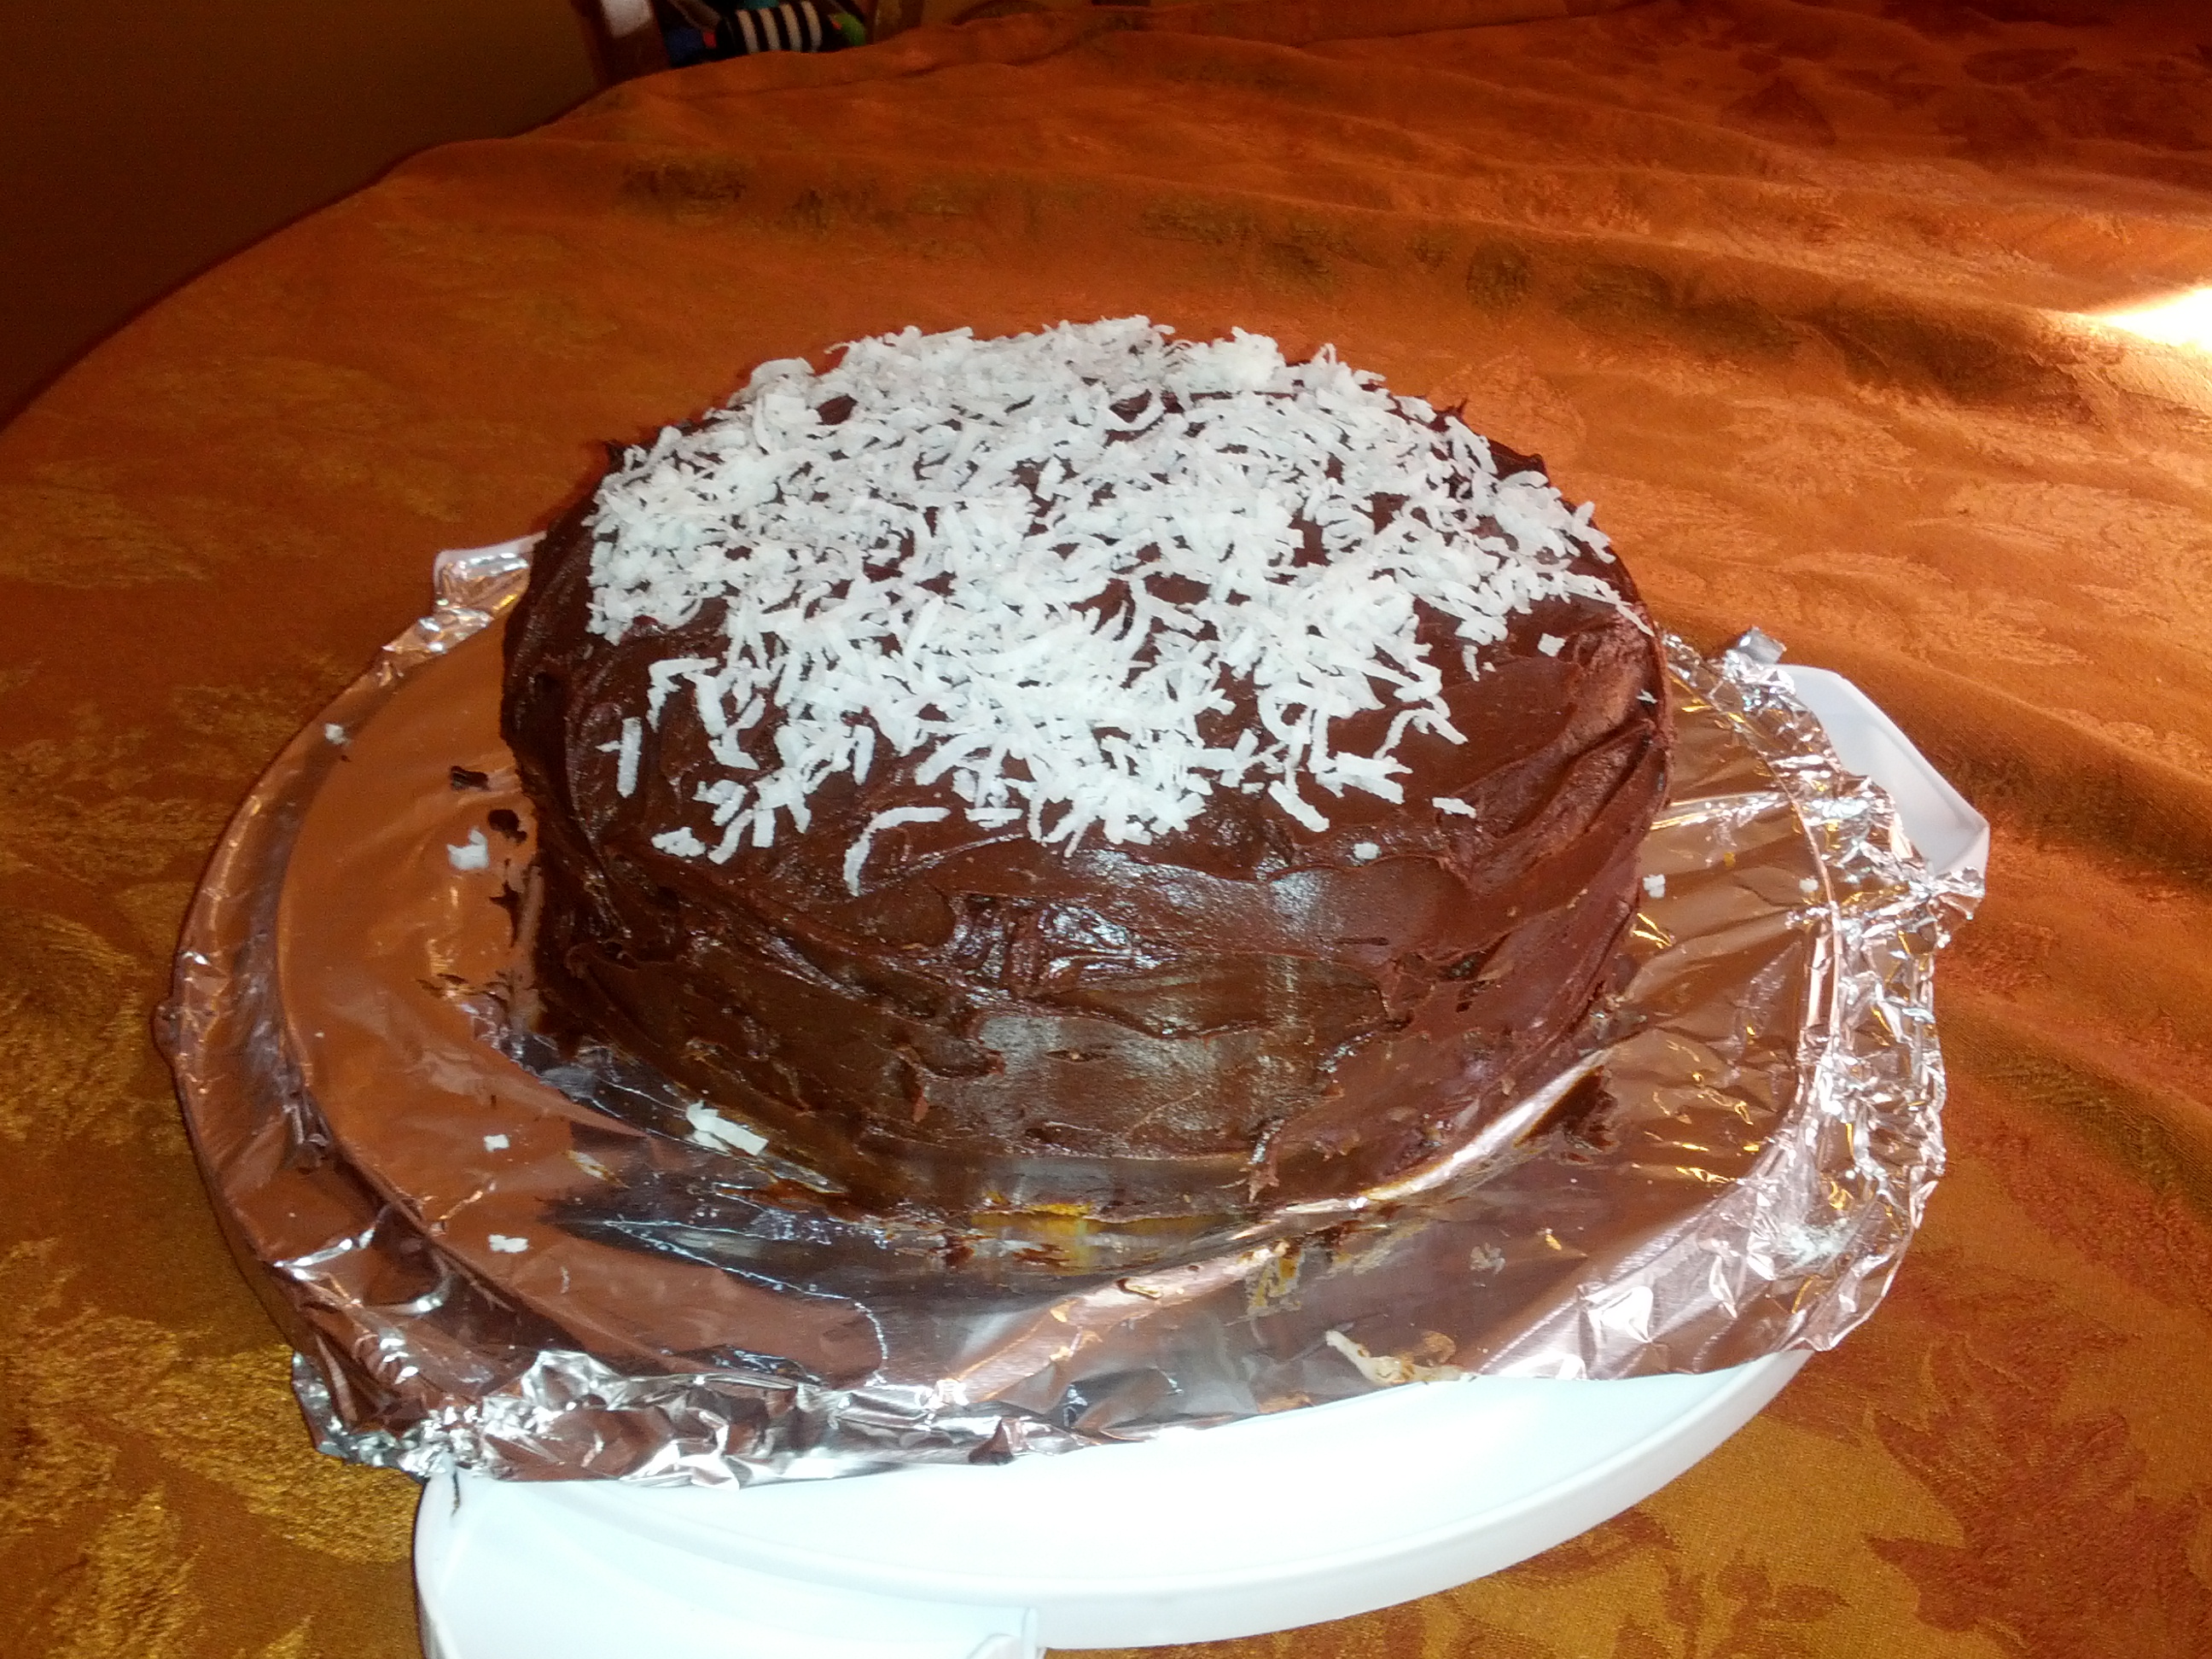
I did a whole lot of baking this past weekend—so much so that I’m only first getting around to posting some photos and recipes now. I made this cake for a family get-together and it turned out delicious. I used one of my favorite vanilla cake recipes and then added a yummy coconut frosting and filling. The frosting was pretty sweet (as frosting tends to be) but the filling wasn’t; and the classic but simple vanilla cake was a nice contrast.

As far as layer cakes go, this one was very easy to whip up. The vanilla cake itself can be thrown together in no time, and then it’s just a matter of letting it cool before assembling—and you can work on the filling and frosting in the meantime.

I recommend serving this cake the same day you make it, if possible. It’ll still be good the day after, and probably even the day after that, but it’s wonderfully moist and fresh the day it actually comes out of the oven.

cake

Vanilla Coconut Cake
Recipe pieced together from here and here

Ingredients:

For the vanilla cake:
1 and 1/2 cups self-rising flour
1 and 1/4 cups all-purpose flour
2 sticks of unsalted butter, softened
2 cups sugar
4 large eggs, at room temperature
1 cup milk (I used half skim and half whole)
1 teaspoon vanilla extract

For the coconut filling:
6 tbsp sugar
1/2 cup sour cream
2 tbsp coconut milk
2/3 cup sweetened shredded coconut (the original recipe calls for 1/2 cup, but I found that the extra coconut helped thicken up the filling for a more substantial layer)

For the chocolate-coconut frosting:
1 stick of butter
2 oz unsweetened chocolate, chopped
1/4 cup cocoa powder
2 cups confectioners sugar
5 tbsp coconut milk
1 tsp vanilla
1/4 tsp salt
1/3 cup sweetened shredded coconut for garnish

Method:

For the vanilla cakes:
1. Preheat your oven to 350 degrees. Butter and flour two 9-inch cake pans; set aside.
2. Combine the flours and set aside.
3. Cream the butter and sugar until fluffy, about 2-3 minutes.
4. Add the eggs, one at a time, beating well after each addition.
5. Add the dry ingredients in three parts, alternating with the milk and vanilla. Be careful not to overbeat.
6. Using a rubber spatula, scrape down the sides of your mixing bowl to make sure the ingredients are well-blended.
7. Pour the batter into your prepared cake pans and bake for 30-40 minutes, or until an inserted toothpick comes out clean (I have a convection oven, and my cakes were done at about the 32-minute mark).
8. Cool the cakes in their pans for about 15 minutes; then invert them onto a wire rack and let them cool completely before assembling the cake.

For the coconut filling:
1. Beat together the sugar, sour cream, coconut milk, and shredded coconut until the mixture is smooth and well-blended; store in the refrigerator until you’re ready to assemble the cake.

For the chocolate-coconut frosting:
1. Using either a saucepan over low heat or your microwave at half-power, melt the butter and unsweetened chocolate until the mixture is smooth. Cool for 10-15 minutes, or until mixture is at room temperature.
2. Transfer the mixture to a larger bowl and blend in the cocoa powder, confectioners sugar, coconut milk, vanilla, and salt. Beat until the frosting is smooth and slightly fluffy. You can add additional confectioners sugar by the tablespoon if you want or need to thicken the frosting.

To assemble:
1. Place one of the vanilla cakes onto a serving plate. Use a knife to level off the top to make it flat, if needed.
2. Spread coconut filling on top of the first cake layer.
3. Check your second cake to make sure the top is relatively flat. If not, use a knife to carefully flatten. Gently place the second cake layer on top of the coconut filling.
4. Use a spatula to cover the top and sides of the cake with frosting.
5. Sprinkle shredded coconut on top of the cake to garnish.

I recommend storing this cake at room temperature the day you make it to keep it nice and moist. However, I’d transfer it to the fridge if it doesn’t all get eaten that same day. Plan ahead when digging into the leftovers—you’ll want about 30-60 minutes to bring the cake back to room temperature after it comes out of the fridge, though my husband ate it cold and liked it just as much as he did the first day.

slicejpg

Brown Velvet Cheesecake Cake

Normally I’m not a big fan of Valentine’s Day. And in all the years my husband and I have been together, I don’t think we’ve ever set foot in a restaurant on V-Day. (What can I say? We’re just not into spending extra money and being forced to order off a pre-fixed menu for no good reason.) But we do have a tradition of enjoying a nice home-cooked meal at the dining room table by candlelight on Valentine’s Day (as opposed to eating on the couch in front of the TV, which we’re definitely guilty of doing more often than we’d like to admit).

This year, I decided to make one of my husband’s favorite pasta dishes and go all out on dessert. My husband can be very picky when it comes to sweets, so I knew that if I wanted to wow him, it was going to have to be something special. Unfortunately, my hectic schedule during the week (you know, kid, job, laundry, the usual) didn’t really afford me the opportunity to spend that extra time slaving over the stove. So we decided to postpone Valentine’s Day until the weekend, which gave me the time I needed to prepare everything the way I wanted.

So about that dessert: I decided to make a brown velvet cheesecake cake. It’s basically your classic red velvet cake sans food coloring with a cheesecake layer in between, covered in cream cheese frosting. I figured it was appropriate for Valentine’s Day, but most importantly, that my husband would really enjoy it.

Why did I skip the red? For some people, that rich red color is what makes the cake special. For me, the red looks unnatural and is actually kind of a turnoff. So I decided to forego the food coloring and let the cocoa cake actually look like cocoa. And I’m glad I did, because my husband claims that the cake tasted better specifically because of that. I’m sure he’s just saying that to be nice, but I’ll take it.

IMGP1687

Brown Velvet Cheesecake Cake
From RecipeGirl

Ingredients:

For the cheesecake:
Two 8-ounce packages cream cheese, at room temperature
2/3 cup granulated sugar
pinch of salt
2 large eggs
1/3 cup sour cream
1/3 cup heavy whipping cream
1 teaspoon vanilla extract

For the brown velvet cake:
2 1/2 cups AP flour
1 and 1/2 cups granulated white sugar
3 tablespoons unsweetened cocoa powder
1 and 1/2 teaspoons baking soda
1 teaspoon salt
2 large eggs, at room temperature
1 and 1/2 cups vegetable or canola oil
1 cup buttermilk
2 teaspoons vanilla extract
2 teaspoons white vinegar

For the cream cheese frosting:
2 and 1/2 cups powdered sugar
Two 8-ounce packages cream cheese, at room temperature
1/2 cup unsalted butter, at room temperature
1 tablespoon vanilla extract

For topping:
A bar of chunk of chocolate to make shavings or curls, optional

Method:

For the cheesecake layer:
1. Preheat your oven to 325 degrees and boil a kettle of water. You’ll need this for a water bath.
2. Spray a 9-inch springform pan with nonstick spray and line the bottom with parchment paper. Wrap a double layer of foil around the bottom and up the sides of the pan, sealing it tightly so that water can’t get in.
3. In a large bowl, use an electric mixer to mix the cream cheese until it’s nice and smooth.
4. Add in sugar and salt and mix for about two minutes, scraping down the sides of the bowl as needed.
5. Add your eggs, one at a time, blending after each addition.
6. Mix in sour cream, whipping cream, and vanilla. Beat until smooth.
7. Pour the batter into the prepared pan. Set the pan into a larger pan (I used a roasting pan) in the pre-heated oven. Pour the hot water from your kettle into the roasting pan so that there’s about an inch of water coming up the foil along the sides of the cheesecake pan.
8. Bake the cheesecake for 45 minutes until it’s set to the touch and doesn’t jiggle.
9. Remove the cheesecake from the roasting pan and let it cool on a wire rack for at least an hour. Once cooled, place the pan into the freezer and let the cheesecake freeze completely. This can be done in several hours. (I made my cheesecake the day before I made the cake and left it in the fridge overnight. I then stuck it in the freezer for about an hour the next morning.)

For the cake layers:
1. Preheat your oven to 350 degrees . Grease and flour two 9-inch baking pans.
2. In a large bowl, whisk together the flour, sugar, cocoa powder, baking soda and salt.
3. Add eggs, oil, buttermilk, food coloring, vanilla and vinegar to the flour mixture. Using an electric mixer on medium-low speed, beat until blended (about one minute). Scrape down the sides and bottom of the bowl with a rubber spatula and then beat the mixture on high for two minutes.
4. Spread the batter evenly into the prepared pans and bake for 30 to 35 minutes, or until an inserted toothpick comes out clean.
5. Cool the cakes in their pans on a wire rack for 10 minutes; then run a knife around the edge of the pans and invert the cakes onto a rack to cool completely.

For the frosting:
1. In a large bowl, using an electric mixer on medium-high speed, beat powdered sugar, cream cheese, butter and vanilla until it is smooth and creamy.

To assemble the cake:
2. Place one cake layer into the center of a cake plate or platter.
3. Remove the cheesecake from the freezer, take off the sides of the pan, and slide a knife under the parchment to remove the cheesecake from the pan. Peel off the parchment.
4. Measure your cheesecake layer against the cake layers. If the cheesecake layer is larger, which it may be, place it on a cutting board and gently shave off some of the exterior to get it to be the same size as your cake layers. (Have a small dish on hand to collect the excess cheesecake—it makes a nice interim snack, trust me.)
5. Place the cheesecake layer on top of the first cake layer. Then place the second cake layer on top of the cheesecake.
6. Apply a layer of frosting to the top and sides of the cake, and then place the cake in the fridge for 30 minutes for the frosting to set.
7. After 30 minutes, remove the cake from the fridge and apply a second layer of frosting. Top with chocolate shavings or curls if desired (I topped my cake with milk chocolate; white chocolate also works well).
8. Store the cake in the fridge until you’re ready to serve it.

IMGP1691

Dried Fruit and Nut Cake

The other day, I was in the mood for something a little different. And I had various containers of dried fruit in my pantry that I really wanted to use up, ‘cause, um, yeah, I needed to clear some space to accommodate my latest Costco run. (Ever been to Costco? That place is wonderful and evil at the same time—especially because whenever I go there, I just seem to get into this mode where I start thinking “yes, it is a good idea to buy three different types of chocolate chips in bulk.”) Anyway, the dried fruit (among other things) had to go, so I took the opportunity to tackle a recipe I’d seen awhile back.

This cake is really more like a giant granola bar. And I’ll warn that it’s fairly dense—you need a pretty solid knife to cut through it. But it’s also super tasty, and incredibly quick and easy to make. The most time-consuming part was chopping up all the dried fruit, and even that only took a few minutes. And the result was an interesting concoction that I’ll happily be eating all week long.

IMGP1510
Dried Fruit and Nut Cake
Recipe from David Leibowitz

Ingredients:
7 tablespoons AP flour
7 tablespoons granulated sugar
3 large eggs
1/2 teaspoon ground cinnamon
1/4 teaspoon ground nutmeg (I like nutmeg, so I used a bit more, but not quite a half teaspoon)
1/8 teaspoon ground cardamom
Pinch of ground cloves (I omitted this)
Pinch of salt
1 and 1/2 cups of chopped up dried fruit (I used dried cranberries, apricots, dates, and prunes)
1 and 1/2 cups of chopped nuts, lightly toasted (I used walnuts and pecans)

Method:
1. Preheat your oven to 300 degrees. Grease a 9-inch loaf pan.
2. Mix the flour, sugar, eggs, salt, and spices in a large bowl.
3. Stir in the dried fruits and nuts.
4. Pour the mixture into the prepared pan and bake for 90 minutes. Cool the cake in its pan. When ready to slice, you’ll definitely want to bust out the cutting board and a sharp knife.